It's been a long time since I posted here. I became a Mother to a perfect 4 lb 6.6 oz baby girl in May 2011 and to say that it changed my entire world would be quite an understatement. I had a difficult pregnancy, followed by a difficult recovery...and it was worth every single ache, pain and worry! I have spent a lot of time crafting my world around being a Mother...from starting a new job with hours more conducive to being a Mother (and less stress!), to all of the duties of Mommyhood to becoming involved in a church for the first time in years and being active in the PTA at my child's daycare. Everything has changed because of my little miracle and I'm loving life! Now, 16 months later, life is returning to normal and I might start blogging again.
Here's a photo of the day my life changed!
Ok, one more little baby picture, then on to the next topic...
Isn't she precious?! I miss her being that small!!
It's only fitting that my first post would be about Karoline's nursery.
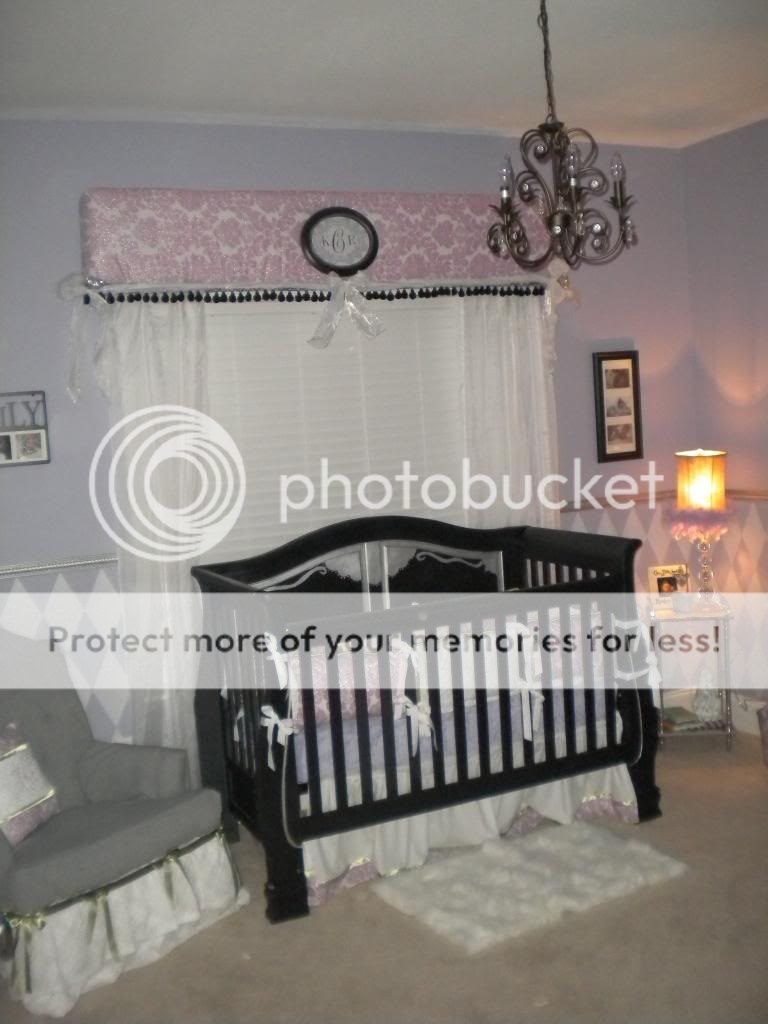
I wanted to create a space that she could grow into. Character/Theme rooms are not my favorite and I wanted something elegant, but still a child's room. I decided against pink because, well...everyone does pink! I decided to go with lavender and light lavender diamonds on the lower half of the wall, with black and silver furniture. And lots of girly touches.
The furniture took an average amount of time, but the walls were a true labor of love. Considering that I was on bedrest from about 28 weeks, which is right around the time I started painting, it took about 6 weeks to finish! Of course, there were times when I was unable to do anything for several days at a time. My husband and Mom did help when I was in the hospital, thank Goodness!
The bed was a Craigslist Find for $130! It was originally a light colored wood. I sanded, painted it black and then decided to add the silver flourishes after I was done. I did spring for custom bedding from Etsy, with the extra $$ I saved on the crib.
Click on the picture below to see the full sized image
I made the cornice board above the window. Plywood, batting, Michael Miller fabric to match the bedding, I can't sew, so it's all held together with nails, screws, staples and hot glue. Lots and lots of hot glue! HAH! I created the monogram in Photoshop and printed on regular copy paper and put in an oval frame. The blinds were already there and I purchased the sheers on Ebay.
The chair to the left was one of an ugly gold pair that I had planned to have professionally recovered. When things got difficult with my pregnancy and I decided to conserve money for hospital bills, I decided to recover it myself. It probably won't last for a long time, but it still looks ok today and it works for us! The pillow was made by the same lady on Etsy that made the bedding.
The table to the right was a Goodwill find that I spray painted metallic silver. The lamp is from Hobby Lobby and I added the purple feather trim. The frames are from Hobby Lobby.
The changing table is an antique dresser that I found at
www.ginasjunk.com in Columbus, GA. It was a dark wood with a bad finish and the top had some terrible veneer on it. I did a lot of sanding on it. Then I painted it, added new knobs and added the changing pad with the minky cover (another Etsy order) I bought the bucket to the left of the dresser from Ebay. I like the idea of using a dresser because she will continue to be able to use it after the changing days are over (which hopefully will be soon!) The mirror is from Hobby Lobby
The vanity, which I love, was another Craigslist find. It was orignally white with a layer of blue underneath...Again...lots of sanding and then painting. I decided against a diaper stacker and used this instead. I use the drawers to store 1) Bibs 2) Socks and 3)Baby Wipes. The door to the right is where we store her bath towels and supplies.
The chandelier was from Lowe's on clearance...$80!
Since these photos were taken. we have added a bookshelf and a hamper. I will have to post pics after I pickup the many, many toys that have also moved in! :) I hope that you enjoyed your tour. Here are a few more pics!
Her first night in the nursery (at about 8 weeks old)
At about six months old:
At about a year old:
And just because I love this picture of her when she was 4 months old! :)
And here she is now...
Thanks for stopping by. I hope that you enjoyed your visit! :)